Tag Archive for: painting

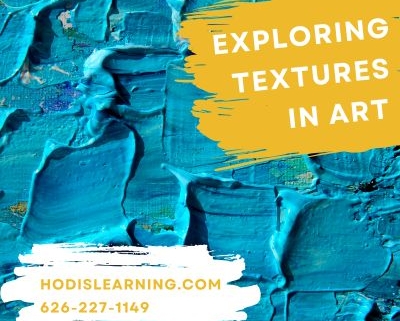
Exploring Textures in Art

Texture plays a vital role in art, bringing life and dimension to an otherwise flat surface. Artists can create textures that are rough, smooth, soft, or even illusionary, adding richness and complexity to their work. In this post, we’ll explore how artists can incorporate and replicate textures in their art using techniques that apply to both painting and drawing. Whether you’re aiming to capture the softness of fur, the roughness of bark, or the smoothness of glass, these tips will guide you on how to achieve realistic, expressive textures.


1. Understanding Texture: Why It Matters

Texture in art can be tactile, a real, physical texture you can feel, or visual, the illusion of texture created on a flat surface. Both types of texture help create depth, engage the viewer’s senses, and bring the subject to life. Texture adds character and can evoke emotions, encouraging the viewer to connect with the piece on a sensory level.

When artists add texture, they’re not just reproducing the look of an object—they’re also adding narrative elements, guiding viewers through an experience with the subject.


2. Techniques for Creating Texture in Painting

Painting offers endless possibilities for creating a variety of textures. Here are some versatile techniques to get started:

– Impasto: Impasto is a technique where paint is applied thickly, creating raised, three-dimensional areas on the canvas. This technique is great for adding texture to objects like rocks, leaves, or clouds. Use a palette knife or a thick brush to layer the paint heavily and build up a physical texture.

– Dry Brushing: To create a rough or grainy texture, use a dry brush with very little paint on it. Lightly drag it across the surface for a broken, textured effect that’s ideal for surfaces like wood, hair, or fabric. Varying the angle and pressure will give even more depth to the effect.

– Sponging and Dabbing: Sponges, paper towels, or even crumpled plastic wrap can be dabbed or pressed into wet paint to create organic, unpredictable textures. This method works especially well for natural elements like leaves, rocks, and mossy surfaces.

– Scumbling: Scumbling involves lightly dragging a dry brush with paint over a painted surface to create a translucent layer. This technique is useful for soft textures, such as clouds, mist, or fabric folds, as it gives a hazy, subtle effect.

Tip: Experiment with various tools like combs, toothbrushes, or even your fingers. Each tool creates unique textures and adds variety to your painting.


3. Techniques for Creating Texture in Drawing

In drawing, texture is created through line work, shading, and pattern. Here are several techniques to try:

– Hatching and Cross-Hatching: These are among the most commonly used methods for adding texture. Hatching involves drawing parallel lines, while cross-hatching layers lines at different angles. This technique can convey rough textures like woven fabric, rough paper, or the skin of certain fruits.

– Stippling: Stippling uses small dots to create texture and shading. Closer, denser dots create darker tones and rough textures, while spaced-out dots make the texture appear lighter and softer. Stippling is time-intensive but is highly effective for natural textures, such as sand or stone.

– Blending and Smudging: Blending pencils or charcoal with tools like tortillons (blending stumps) or even your finger can create smooth, soft textures, perfect for things like skin, cloth, or glass. Experiment with different pressures to vary the effect.

– Sgraffito: This technique involves scratching away a layer to reveal what’s underneath. To use sgraffito in pencil drawing, you can shade an area densely and then use an eraser or a sharp point to scratch in details, like the veins in leaves or fur texture.

Tip: Explore the texture of different papers as well. Rougher paper enhances the effect of pencil strokes, creating a more tactile feel.


4. Combining Techniques to Create Realistic Textures

– Skin and Fur: Begin with a base layer of blending to capture the smoothness of skin or the density of fur, then add details using cross-hatching or fine lines to mimic pores, wrinkles, or individual hairs.

– Water and Reflections: Start with a smooth base, using blending or wet-on-wet painting to capture water’s fluid quality. Then, add ripples, highlights, or reflections with light, broken brushstrokes or eraser marks for realism.

– Stone and Brick: Use sponging or stippling to create an irregular surface, then add details like cracks or rough edges with fine hatching or dry brushing to capture the gritty surface of stone or brick.

Tip: To fully develop these textures, observe your subject carefully. Study how light interacts with the texture, as this can make all the difference in creating realism.


5. Tips for Applying Texture Thoughtfully

– Emphasize Key Areas: Use more texture in focal areas where you want to draw the viewer’s attention, and keep the background or less important elements smoother or simpler.

– Create Contrast: Combining rough and smooth textures adds visual contrast and interest. For example, place a rough, impasto texture next to a smooth, blended area to emphasize both textures.

– Practice Observation: Study textures around you—brick walls, tree bark, fabric, glass surfaces—and try replicating them in small sketches or swatches to get comfortable with the techniques.

– Balance Detail and Simplicity: Use texture in moderation. Sometimes, less is more when it comes to adding texture to a piece. Decide on the purpose of each texture and keep it cohesive with the overall piece.


Conclusion

Textures give life, depth, and realism to artworks, bridging the gap between a two-dimensional surface and the rich sensory world we experience. By experimenting with these techniques, artists can capture the essence of their subjects, whether they’re aiming to depict the delicate softness of a petal or the ruggedness of a mountain. So grab your tools, experiment, and let texture bring new dimensions to your art!


Discover Your Unique Style with Hodis Learning & Music

At Hodis Learning & Music, we offer art lessons that cover a wide range of techniques, including creating realistic and expressive textures. Our experienced instructors work with students at all skill levels, helping them to discover and refine their unique style. Whether you’re interested in drawing, painting, or exploring other mediums, we’re here to support your creative journey. Call or email us today to learn more and start bringing texture and life to your art!

Mastering Landscape Painting

Landscape painting invites artists to explore the beauty of the natural world, capturing its colors, shapes, and emotions on canvas. Whether you’re painting a tranquil forest, a dramatic mountain range, or a bustling urban park, understanding the foundational techniques of landscape painting is essential to capturing each scene’s unique character. In this guide, we’ll explore essential techniques and tips for painting landscapes, focusing on perspective, atmospheric effects, and the nuances of different environments.


1. The Importance of Perspective in Landscape Painting

Perspective is one of the most crucial techniques in landscape painting, as it adds depth and realism to a flat surface. There are two main types to consider: linear perspective and aerial perspective.

Linear Perspective: Linear perspective uses converging lines to create the illusion of depth. To achieve this, identify a horizon line and establish one or more vanishing points—points where parallel lines converge. This technique helps to create a sense of distance and structure, particularly in landscapes with paths, roads, or architectural elements.

Aerial (or Atmospheric) Perspective: Aerial perspective relies on color and value to create depth. Objects in the foreground are typically painted with sharper, warmer tones, while those in the background appear lighter, cooler, and slightly blurred. This gradual change in color and detail mimics how the human eye perceives distance and enhances the three-dimensionality of your landscape.

Tip: When starting your painting, sketch the horizon line and place a few basic elements in the foreground, midground, and background to help establish a solid foundation for perspective.


2. Creating Atmospheric Effects

Atmospheric effects, such as light, weather, and time of day, add a dynamic quality to landscapes. Mastering these elements brings life and movement to your work, conveying a specific mood or feeling.

– Light and Shadow: Light changes throughout the day, affecting colors and contrast. Observe how light behaves at different times—soft and warm at sunrise, harsh and bright at midday, or muted and golden at dusk. Use a range of tones to capture the direction and quality of light, and remember that shadows in nature aren’t just black or gray; they often carry hints of color from the surrounding environment.

– Weather Conditions: Weather adds variety to landscapes. For a rainy scene, consider using muted colors and softer brushstrokes to create a hazy effect. For a sunny day, use bright, warm colors and crisp edges. For foggy scenes, keep distant elements indistinct, blending colors to capture the softening effect of mist.

– Seasonal Changes: Each season offers unique color palettes and textures. Spring landscapes may be rich in greens and pastels, while autumn scenes feature warmer, earthy tones. Adjusting your palette and brush techniques to reflect the season helps capture the essence of each setting.

Tip: Experiment with transparent layers (glazing) to capture the subtle shifts in light and atmosphere. Thin washes of color can help you build realistic transitions and make the scene appear more natural.


3. Capturing the Essence of Different Environments

Each type of landscape, from forests to coastal cliffs, has distinct characteristics. Understanding these can help you authentically capture the essence of each environment.

– Forests and Woodlands: Forests often feature overlapping layers of trees and foliage. To paint them realistically, focus on building texture and depth. Use a mix of short, textured brushstrokes for leaves and branches, and vary the green tones to reflect the light filtering through the canopy. Forest floors may have scattered leaves, rocks, or moss, which can be painted with small, detailed strokes for added realism.

– Mountains and Cliffs: Mountains and rocky landscapes have strong, angular shapes. Use bold strokes and a limited color palette to create the rugged look of rocks and cliffs. Shadows play an essential role here, so pay attention to the direction of light and how it interacts with the irregular surfaces. Blending cool and warm grays can help capture the texture of stone.

– Water and Reflections: Painting water involves capturing its movement and reflections. For still water, use horizontal brushstrokes and focus on mirroring nearby elements. For waves or rivers, use varied, sweeping strokes to show the flow and add highlights to represent light hitting the water’s surface. Remember that reflections are softer and often slightly darker than the objects they mirror.

– Urban Landscapes: Urban landscapes require a mix of structured perspective and atmospheric effects. Start by establishing strong lines for buildings, roads, and other man-made structures. Add life with soft or diffused shadows to create depth, and use pops of color for signs, cars, or people to make the scene feel dynamic.

Tip: When tackling a new environment, spend time observing its unique textures, colors, and light effects. Take reference photos, if possible, and make quick sketches to familiarize yourself with its distinctive features.


4. Essential Techniques and Tips for Success

– Layering: Building up layers adds depth and complexity to a painting. Start with broad strokes to block in major elements, then add layers of details as you move forward. This approach helps create a sense of distance and fullness in the scene.

– Color Mixing and Harmony: Nature is rarely made up of pure colors. Practice blending to achieve naturalistic tones and ensure harmony across your palette. Using complementary colors sparingly can also make certain elements pop without overwhelming the scene.

– Brush Techniques: Different brush strokes can create varied textures, like rough stippling for trees, sweeping strokes for skies, or dabbing for rocks. Experiment with brush sizes and shapes to achieve the textures that best suit each part of your landscape.

– Observation and Patience: The more you observe real landscapes, the more natural your paintings will feel. Study photographs or spend time outdoors to observe color shifts, light patterns, and atmospheric effects in real time.

Tip: Don’t rush the process—landscape painting often requires patience to capture details and build layers. Give yourself time to adjust and refine your work as the painting unfolds.


Conclusion

Landscape painting offers a rewarding way to connect with nature and express its beauty on canvas. By focusing on perspective, atmospheric effects, and environment-specific techniques, you can bring your landscapes to life with depth and authenticity. With practice and attention to detail, your landscapes will become windows into the natural world, inviting viewers to explore and feel the unique atmosphere of each scene. So grab your brushes, step outside, and start capturing the world around you—one stroke at a time.

At Hodis Learning & Music, we believe that every artist can develop their unique style with the right guidance and practice. Our art lessons cover landscape painting, perspective, color theory, and much more, designed for artists of all ages and skill levels. Whether you’re just starting out or looking to refine your technique, our experienced instructors are here to help you bring your creative vision to life. Call or email us today to get started.

Collaborative Art Projects

In the art world, collaboration is more than just working together—it’s a transformative process that can elevate creative ideas to new heights. We’re reviewing the benefits of collaboration in art, highlighting successful examples, and sharing advice on how artists can find and work effectively with collaborators.


The Value of Collaboration in Art

Artistic collaboration brings together diverse skills, ideas, and experiences, leading to outcomes that often go beyond what any single artist could achieve alone. Collaboration encourages artists to:

  1. Expand Their Skill Set: Working with others offers the chance to learn new techniques, mediums, or tools.
  2. Push Creative Boundaries: Collaborating partners challenge each other to think outside the box, often resulting in groundbreaking work.
  3. Gain a New Perspective: Sharing ideas fosters empathy and understanding, enriching the creative process.
  4. Build Lasting Connections: Art is a deeply personal experience, and creating together can form strong, meaningful connections with like-minded creatives.


Showcasing Successful Collaborative Art Projects

Collaboration in art has a rich history, with many well-known artists producing iconic pieces through creative partnerships. Here are a few examples:

1. Jean-Michel Basquiat and Andy Warhol

This unlikely duo from the 1980s combined Warhol’s pop art style with Basquiat’s graffiti-inspired aesthetic to create pieces that challenged conventional art forms. Their work is a testament to the power of merging different artistic voices.

2. Christo and Jeanne-Claude

Known for their large-scale environmental installations, such as “The Gates” in Central Park, the husband-and-wife team transformed landscapes into immersive, transformative experiences. Their collaboration exemplifies how two people can share a singular vision and bring it to life on a monumental scale.

3. Gorillaz Music and Visual Art Collaboration

This virtual band combines music, digital animation, and visual art, demonstrating how cross-disciplinary collaboration can create an innovative art form. Musicians, animators, and visual artists work together to build an immersive, multimedia experience for fans.


How to Find the Right Collaborator

For artists interested in collaborative work, finding the right partner is essential. Here are some tips for identifying and connecting with potential collaborators:

  1. Know Your Own Artistic Goals: Before reaching out, have a clear sense of what you want to accomplish. This clarity will help you identify a collaborator whose vision aligns with yours.
  2. Seek Out Artists with Complementary Skills: Think about what your project needs—perhaps a muralist could use the skills of a digital artist, or a photographer might want to work with a graphic designer. Complementary skills can enrich the final result.
  3. Join Local Art Communities and Online Platforms: Community art centers, art schools, and online platforms like Behance and Instagram can be great places to connect with like-minded artists. Many online art communities allow artists to showcase work and find potential collaborators with similar interests.
  4. Attend Art Events and Exhibitions: In-person connections can be powerful, and attending events in your local area or online art fairs can open doors to meeting artists with similar aspirations.


Tips for a Successful Collaborative Experience

Collaborative projects can be incredibly rewarding but require open communication and flexibility. Here’s how to make sure the process goes smoothly:

  1. Set Clear Roles and Expectations: Decide who is responsible for what, and establish a timeline for completing each part of the project. Clear roles prevent confusion and help keep everyone accountable.
  2. Communicate Regularly and Honestly: Discuss ideas openly, give and receive constructive feedback, and keep each other updated on progress. Communication builds trust and keeps the project on track.
  3. Embrace Compromise: Collaboration means finding middle ground. Be open to feedback and flexible with your ideas—compromise often leads to more innovative outcomes.
  4. Celebrate Each Step: Acknowledge milestones along the way and celebrate each phase of the creative journey. Small celebrations keep the team motivated and engaged.


Conclusion

Collaboration in art unlocks opportunities for growth, innovation, and creative exploration that solo projects often cannot achieve. At Hodis Learning & Music, we are passionate about fostering collaborative learning environments where our students can connect, share, and inspire each other. We encourage you to seek out opportunities for creative collaboration and experience the unique magic of working alongside others. Whether you’re a seasoned artist or just starting out, there’s a world of potential waiting to be discovered when artists come together. Call or email us today to get started.

Art Lessons at Hodis Learning & Music

Private art lessons are tailored for individuals of all ages and skill levels who are passionate about exploring their creativity and improving their artistic abilities. At Hodis Learning & Music, we believe that art lessons are valuable for various reasons and can benefit a wide range of individuals. We’ve listed out the main benefits of art lessons below.


Skill Development

Art lessons improve technical skills such as drawing, painting, sculpting, and more, honing an individual’s artistic abilities over time.

Students can also develop their creativity, motor skills, coordination, and emotional expression through various art mediums.


Creative Expression

Art allows individuals to express themselves in a unique and personal way, fostering self-awareness and self-expression.

Creative expression can be valuable because it allows students to tell their unique stories, share their worldview, express their emotions, and even inspire change through art.


Stress Reduction

Creating art can be therapeutic, reducing stress, anxiety, and promoting relaxation and mindfulness.

That’s why art lessons can be valuable not just for young children, but also teens who are seeking a hobby outside of school, or busy adults who want to participate in a relaxing activity.


Problem-Solving and Critical Thinking

Art encourages individuals to think creatively, experiment with ideas, and solve problems through visual expression.

Students might have an idea for a creation, and then plan how they want to execute their vision. If their work doesn’t turn out as expected, an art student will need to determine how to fix or modify their work. In order to improve or best express their vision, artists will have to constantly refine their art, hone their skills, and seek feedback from art mentors and educators who can help them improve.


Portfolio Building

For those pursuing art professionally, art lessons will help individuals build a strong portfolio that showcases their skills and attract career opportunities.

Our expert art educator can offer valuable feedback and advice for how a student can tailor their portfolio so it’s attractive to schools, galleries, and exhibits.

Even art students who don’t plan to attend art school or pursue a career as an artist might find it helpful to have a curated portfolio that can mark their progress and skills.


Personal Fulfillment

Engaging in artistic endeavors can bring joy, satisfaction, and a sense of accomplishment, contributing to overall well-being.

Students of all ages and skill levels can appreciate the sense of pride when they finally master a challenging technique or feel confident in their ability to wield a new medium, like oil paints or charcoal. Art lessons allow everyone to pursue lifelong learning and accomplish goals at any stage of life.


Art Lessons for All Skill Levels

No matter where you are on your artistic journey, professional art lessons can help you learn fundamental principles, techniques, and skills.

Beginners: Art lessons will introduce fundamental techniques and concepts, providing a strong foundation for future artistic growth.

Intermediate: Lessons refine existing skills, expand knowledge, and allow students to experiment with new mediums and styles.

Advanced: Tailored lessons can help advanced artists refine their techniques, overcome creative blocks, and push the boundaries of their artistic abilities.


Art Lessons for All Mediums

Our professional art instructor teaches a variety of mediums and career advancement courses including:

At Hodis Learning & Music, we offer personalized, one-on-one private art lessons with experienced instructors who tailor the curriculum to each student’s interests and skill level. We strive to create a nurturing and supportive environment that fosters creativity, growth, and a love for the arts.

Call or email us to schedule your first session today! 

art and mindfulness

Art and mindfulness are two practices that can be deeply enriching and rewarding. When combined, they can offer a powerful way to find peace and focus, reduce stress, and boost creativity.


What is mindfulness?

Mindfulness is the practice of paying attention to the present moment without judgment. It involves focusing on your thoughts, feelings, and bodily sensations without getting caught up in them or attached to them. Mindfulness can be practiced through a variety of activities, such as meditation, yoga, and tai chi.


How is art related to mindfulness?

Art is a form of creative expression that can be used to explore and process your thoughts, feelings, and experiences. When you create art, you are forced to slow down and focus on the present moment. You must pay attention to your senses, your emotions, and your creative impulses. This process can be very mindful.


Benefits of combining art and mindfulness

There are many benefits to combining art and mindfulness. Here are a few:

  • Reduces stress and anxiety. Art can be a great way to relax and de-stress. When you focus on creating art, you are able to let go of your worries and focus on the present moment. This can help to reduce stress and anxiety.
  • Boosts creativity. Art is a great way to express your creativity. When you are mindful while creating art, you are more likely to tap into your creative flow and come up with new and innovative ideas.
  • Improves focus and concentration. Creating art requires focus and concentration. When you are mindful while creating art, you are training your mind to stay present and focused. This can improve your focus and concentration in other areas of your life as well.
  • Increases self-awareness. Art can help you to become more aware of your thoughts, feelings, and experiences. When you create art, you are forced to reflect on your inner world. This process can help you to better understand yourself.


How to combine art and mindfulness

There are many ways to combine art and mindfulness. Here are a few tips:

  • Choose an art form that you enjoy. There are many different art forms, such as painting, drawing, and photography. Choose an art form that you enjoy and that you feel comfortable with.
  • Find a quiet space where you can create your art. This will help you to focus and avoid distractions.
  • Start by taking a few deep breaths. This will help you to relax and center yourself.
  • Pay attention to your senses as you create your art. Notice the colors, textures, and sounds that you are experiencing.
  • Don’t judge your work. The goal of mindful art is to express yourself creatively, not to create a perfect work of art. Let go of any expectations and simply enjoy the process of creating.


Here are some specific art activities that you can try:

  • Mindful painting: Choose a simple subject to paint, such as a flower, a sunset, or a landscape. Focus on the present moment as you paint and pay attention to your thoughts, feelings, and bodily sensations.
  • Mindful drawing: Find a comfortable position to sit or stand and hold your drawing utensil in your hand. Take a few deep breaths and close your eyes. Focus on your breath and on the feeling of the drawing utensil in your hand. When you are ready, open your eyes and start drawing. Don’t judge your work and simply enjoy the process of creating.
  • Mindful photography: Go for a walk in nature and take some photos of the things that you see. As you take each photo, focus on the present moment and on the beauty of the natural world around you.


Conclusion

Art and mindfulness are two powerful practices that can be combined to create a transformative experience. When you create art mindfully, you are able to relax and de-stress, boost your creativity, improve your focus and concentration, and increase your self-awareness. If you are looking for a way to improve your overall well-being, consider combining art and mindfulness into your daily routine.


Sign Up for Expert, Individualized Art Lessons Today!

Hodis Learning & Music provides expert, individualized art lessons to students of all ages and backgrounds, helping them embark on their unique musical journey or art school applications. Learn more about our services by calling or emailing us today! 

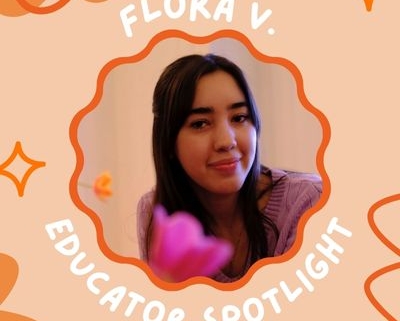
Flora V. Educator Spotlight

What subjects do you teach?

  • Art: Painting, Drawing, Illustration, Sculpture, Photography, Videography, Video Editing, Graphic Design, Portfolio Planning & Development
  • Academics: Art History, Creative Writing, Screenwriting
  • Music: Ukulele, Guitar

What’s the most rewarding part of being an educator?

The most rewarding part of being an educator is when my students express a desire to learn or practice a subject more! As an educator, it is my job to inspire enthusiasm, and I know I have succeeded when a student asks to spend more time experimenting, initiates a project, or shows a deeper curiosity about what we are learning.


What are the most common areas you see your students struggling in? How do you help them in those areas?

Although all my students have unique strengths and weaknesses, the most common area I see them struggling in is their self-confidence. Many of my students are ambitious and highly creative, and with this, mistakes and self-doubt naturally occur.


How do you help them improve in those areas?

To help my students overcome issues with self-confidence, I encourage mistakes through playful experimentation and always ask them to analyze their work to discover areas of improvement. I find this helps them see that making mistakes is part of the process of learning and that their self-confidence should be determined by their desire to learn and grow!


What do you enjoy doing outside of teaching students?

Outside of teaching, I enjoy making art, short films, and music; I always have a project or two I am working on in my free time. I also love to cook and take walks with my dog Dusty!


What do you think makes Hodis Learning & Music a great service and company to work for?

I love working for Hodis Learning & Music because they encourage dynamic and individualized education. I appreciate that HLM does not confine educators to a generalized lesson model, as this allows me to tailor each course I teach to my student’s needs. Additionally, I feel valued as an educator and part of a greater community at HLM!

Learn more about Flora.

Color Theory

Color theory is the study of how colors interact with each other and how they affect human emotions. It is a complex and fascinating subject, and it can be used to create powerful and expressive works of art.


Primary, Secondary, and Tertiary Colors

The primary colors are red, yellow, and blue. They cannot be created by mixing other colors. The secondary colors are orange, green, and purple. They are created by mixing two primary colors together. The tertiary colors are created by mixing a primary color with a secondary color.


Warm and Cool Colors

Colors can also be classified as warm or cool. Warm colors, such as red, orange, and yellow, evoke feelings of warmth, excitement, and energy. Cool colors, such as green, blue, and purple, evoke feelings of calmness, relaxation, and peace.


Color Theory in Art

Artists use color theory to create specific moods and emotions in their work. For example, a painter might use warm colors to create a sense of excitement or joy, or they might use cool colors to create a sense of calmness or peace.

Here are some examples of how artists use color psychology in their work:

  • Vincent van Gogh: Van Gogh was known for his use of bold, vibrant colors. His paintings, such as “The Starry Night” and “Sunflowers,” evoke feelings of energy, excitement, and passion.
  • Pablo Picasso: Picasso went through different color phases in his work. His Blue Period paintings were dominated by cool blue tones, and they evoked feelings of sadness and melancholy. His Rose Period paintings were dominated by warm pink and red tones, and they evoked feelings of joy and happiness.
  • Mark Rothko: Rothko was known for his large-scale abstract paintings that used color to create a sense of awe and wonder. His paintings, such as “No. 10” and “No. 61 (Rust and Blue),” are often described as meditative and calming.


Using Color Theory and Psychology in Your Own Art

If you are an artist, you can use color theory and psychology to create more expressive and impactful works of art. Here are a few tips:

  • Consider the mood and emotions that you want to evoke. What kind of feeling do you want your viewers to have when they look at your work? Once you know the mood and emotions that you want to evoke, you can choose colors that will help you to achieve that goal.
  • Use color contrast. Color contrast can be used to create a sense of excitement and drama in your work. For example, you could juxtapose a warm color with a cool color, or a light color with a dark color.
  • Experiment with different color combinations. There are no rules when it comes to using color in art. Experiment with different color combinations to see what works best for you and the mood that you are trying to create.


Conclusion

Color theory is a powerful tool that can be used to create expressive and impactful works of art. By understanding the psychology of colors, you can choose colors that will help you to evoke the desired mood and emotions in your viewers. So, don’t be afraid to experiment with color in your art. The possibilities are endless!


Sign Up for Expert, Individualized Art Lessons Today!

Hodis Learning & Music provides expert, individualized art lessons to students of all ages and backgrounds, helping them embark on their unique musical journey or art school applications. Learn more about our services by calling or emailing us today!

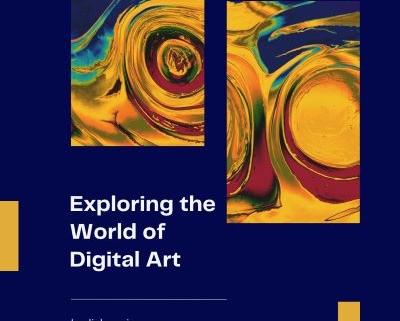
Exploring the World of Digital Art

Digital art is a form of art that is created using digital technology. It encompasses a wide range of styles and genres, from digital paintings and illustrations to photo manipulations and 3D modeling. Digital art is becoming increasingly popular, as it offers artists a wide range of creative possibilities and allows them to share their work with a global audience.


Embracing Technology in Artistic Expression

Technology can be a powerful tool for artistic expression. Digital art tools allow artists to create new and innovative forms of art, and to experiment with different techniques in ways that would not be possible with traditional art forms.

For example, digital artists can use layers to create complex compositions, and they can use undo/redo functions to experiment with different ideas without having to start over from scratch. They can also use digital effects and filters to create unique and eye-catching visuals.

In addition, digital art tools make it easy for artists to share their work with the world. Artists can post their work on social media, submit it to online galleries, or even sell it online. This gives artists a much wider reach than they would have with traditional art forms.


The Benefits of Digital Art

There are many benefits to using digital art tools, including:

  • Versatility: Digital art tools can be used to create a wide range of art styles, from realistic paintings to abstract illustrations.
  • Flexibility: Digital art is easy to edit and manipulate, which gives artists a lot of flexibility in their work.
  • Affordability: There are many free and open-source digital art programs available, making it affordable for anyone to get started with digital art.

Accessibility: Digital art programs are available for a variety of platforms, including computers, tablets, and smartphones. This makes it easy for artists to create digital art wherever they are.


Different Types of Digital Art

There are many different types of digital art, including:

  • Digital painting: Digital painting is the creation of art using a digital painting program. Digital painting programs allow artists to create realistic and painterly effects using their computer.
  • Digital illustration: Digital illustration is the creation of art using a vector graphics editor. Vector graphics editors allow artists to create sharp and scalable images that can be used for a variety of purposes, such as logos, icons, and web graphics.
  • Photo manipulation: Photo manipulation is the process of editing and manipulating existing photos. Photo manipulation artists can use a variety of techniques to create new and creative images, such as adding or removing objects, changing the colors, or merging different photos together.
  • 3D modeling: 3D modeling is the process of creating three-dimensional models of objects and scenes. 3D models can be used to create video games, movies, animated films, and other digital content.


Getting Started with Digital Art

If you are interested in getting started with digital art, here are a few tips:

  1. Choose a digital art program. There are many different digital art programs available, both free and paid. Some popular options include Adobe Photoshop, Procreate, Clip Studio Paint, and Krita.
  2. Learn the basics of your chosen program. Once you have chosen a digital art program, you need to learn the basics of how to use it. This includes learning how to use the different tools, brushes, and filters. There are many tutorials available online and in books.
  3. Start practicing. The best way to learn digital art is by practicing. Experiment with different techniques and see what works best for you. Don’t be afraid to make mistakes.

Share your work. Once you have created some digital art that you are proud of, share it with the world! You can post it on social media, submit it to online galleries, or even sell it online.


Conclusion

Digital art is an exciting and rewarding medium for artistic expression. It offers artists a wide range of creative possibilities and allows them to share their work with a global audience. If you are interested in learning more about digital art, there are many resources available online and in libraries.


Sign Up for Digital Art Lessons Today!

Sign up for Digital Art lessons with our expert art instructor today! Our art lessons are for students of all ages and backgrounds. Whether you’re a complete beginner or hoping to prepare for art school admissions, we have the right instructor for you! Learn more by calling or emailing us today!

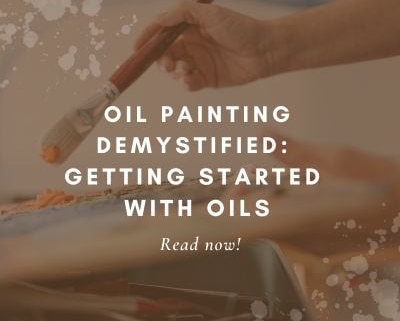
Oil Painting Demystified: Getting Started With Oils

In this blog, we’re demystifying oil painting for beginners! If you’ve ever seen the textures and vibrant colors in an oil painting, and wondered how to create your own masterpiece, you’re in the right place.

Oil painting is a timeless art form. Today, we’ll unravel the mysteries of oil painting and provide you with essential tips and techniques to start your oil painting journey with confidence.

1. Master the Basics of Oil Painting

Begin with a simple subject and a limited color palette. This will help you develop foundational techniques that you can expand on as you become more skilled.

2. Use High-Quality Materials

Invest in good quality oil paints, brushes, and canvas. Better materials can make a significant difference in the outcome of your paintings. Visit an art store and talk to employees to get recommendations, or research online.

3. Prepare Your Canvas Properly

Before you start, apply a thin layer of gesso to prepare your canvas. This layer creates a smooth surface and keeps oil from seeping into the canvas.

4. Understand Color Mixing

Start with primary colors (red, blue, and yellow) and experiment with mixing them to create secondary and tertiary colors. It’s also helpful to learn color theory and how to mix colors.

5. Limit Your Color Palette

Limit your color palette to a few main colors when starting out. This will make it easier to control your mixes and learn about color relationships. It can also be less overwhelming and help you focus your painting.

6. Begin With Thin Layers

Start with a small amount of paint mixed with linseed oil or turpentine to create thin layers. This technique will help you to control your painting and allows the paint to dry faster.

7. Try Out Different Brushes

Play around with various brush sizes, shapes, and bristle types. Each brush has unique qualities and produces different textures and strokes. This will allow you to create more detailed and interesting paintings.

8. Work From Dark to Light

Start with filling in the dark areas of your painting and slowly work your way up to using lighter tones. This creates depth and dimension in your artwork.

9. Allow Time for Drying

Oil paints take a longer time to dry compared to other painting mediums. Be patient and let each layer dry fully before applying another layer or making adjustments.

10. Practice and Experiment

The key to improving your oil painting skills is practice. It’s important to experiment and learn from any mistakes you make. Part of the fun of oil painting is enjoying the process!

Practice Oil Painting With an Expert Educator

With time, patience, and dedication, you will develop your unique style and technique. Hodis Learning & Music also has expert art educators who can help you on your oil painting journey. Learn more or schedule your first session by calling or emailing us today.

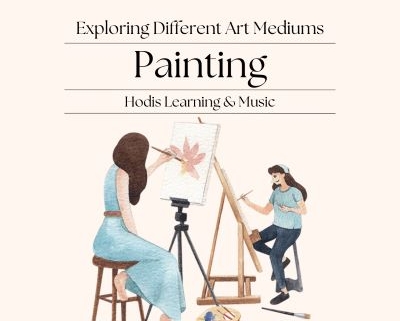
Exploring Different Art Mediums: Painting.

Painting is one of the most popular and widely practiced art forms in the world. Artists throughout history have used painting to express their creativity and communicate their ideas. From traditional oil paintings to contemporary mixed media works, painting has evolved over time and continues to inspire artists today. In this blog post, we will explore the different art mediums used in painting.


Introduction to Painting

Painting is the practice of applying paint, pigment, or other materials to a surface to create an image. The earliest paintings date back to prehistoric times, and the practice has continued to evolve over time. Painting can be done on a variety of surfaces, including canvas, paper, wood, and walls.


Different Painting Mediums

There are many different mediums that artists use in painting. Each medium has its own unique properties and requires different techniques. Some common painting mediums include:

  • Oil Painting: Oil painting is a classic medium that has been used for centuries. It involves mixing pigment with oil, usually linseed oil, to create a thick, slow-drying paint. Oil paints can be layered to create depth and texture, and they are known for their rich, vibrant colors.
  • Watercolor Painting: Watercolor is a versatile medium that uses water-soluble pigments to create translucent, fluid paintings. It is often used for landscapes, portraits, and still lifes. Watercolor paintings are known for their luminosity and delicate, transparent colors.
  • Acrylic Painting: Acrylic paint is a newer medium that was developed in the 1950s. It is made of synthetic polymer emulsion, which dries quickly and can be used on a variety of surfaces. Acrylic paints are known for their bright, bold colors and versatility.
  • Mixed Media Painting: Mixed media painting involves combining different materials and techniques to create a single work of art. This can include using a combination of paint, collage, and drawing techniques.


Conclusion

Painting is a dynamic art form that continues to evolve with new techniques and materials. Whether you prefer traditional oil painting or contemporary mixed media works, there is no shortage of ways to express your creativity through painting. By exploring the different art mediums used in painting, you can expand your artistic horizons and find new inspiration for your own work.


Sign Up for Painting Lessons!

Take your painting skills to the next level with tailored art instruction at Hodis Learning & Music! Our expert art teachers have years of experience helping students of all ages and skill levels hone their artistic talent. Whether you’re  complete beginner or you’re hoping to cultivate a stellar art portfolio for art school admissions or a professional art career, we have the right art teacher for you! Call or email us to learn more or schedule your first session today.

Exploring Different Art Mediums Series

Sculpture  |  Photography